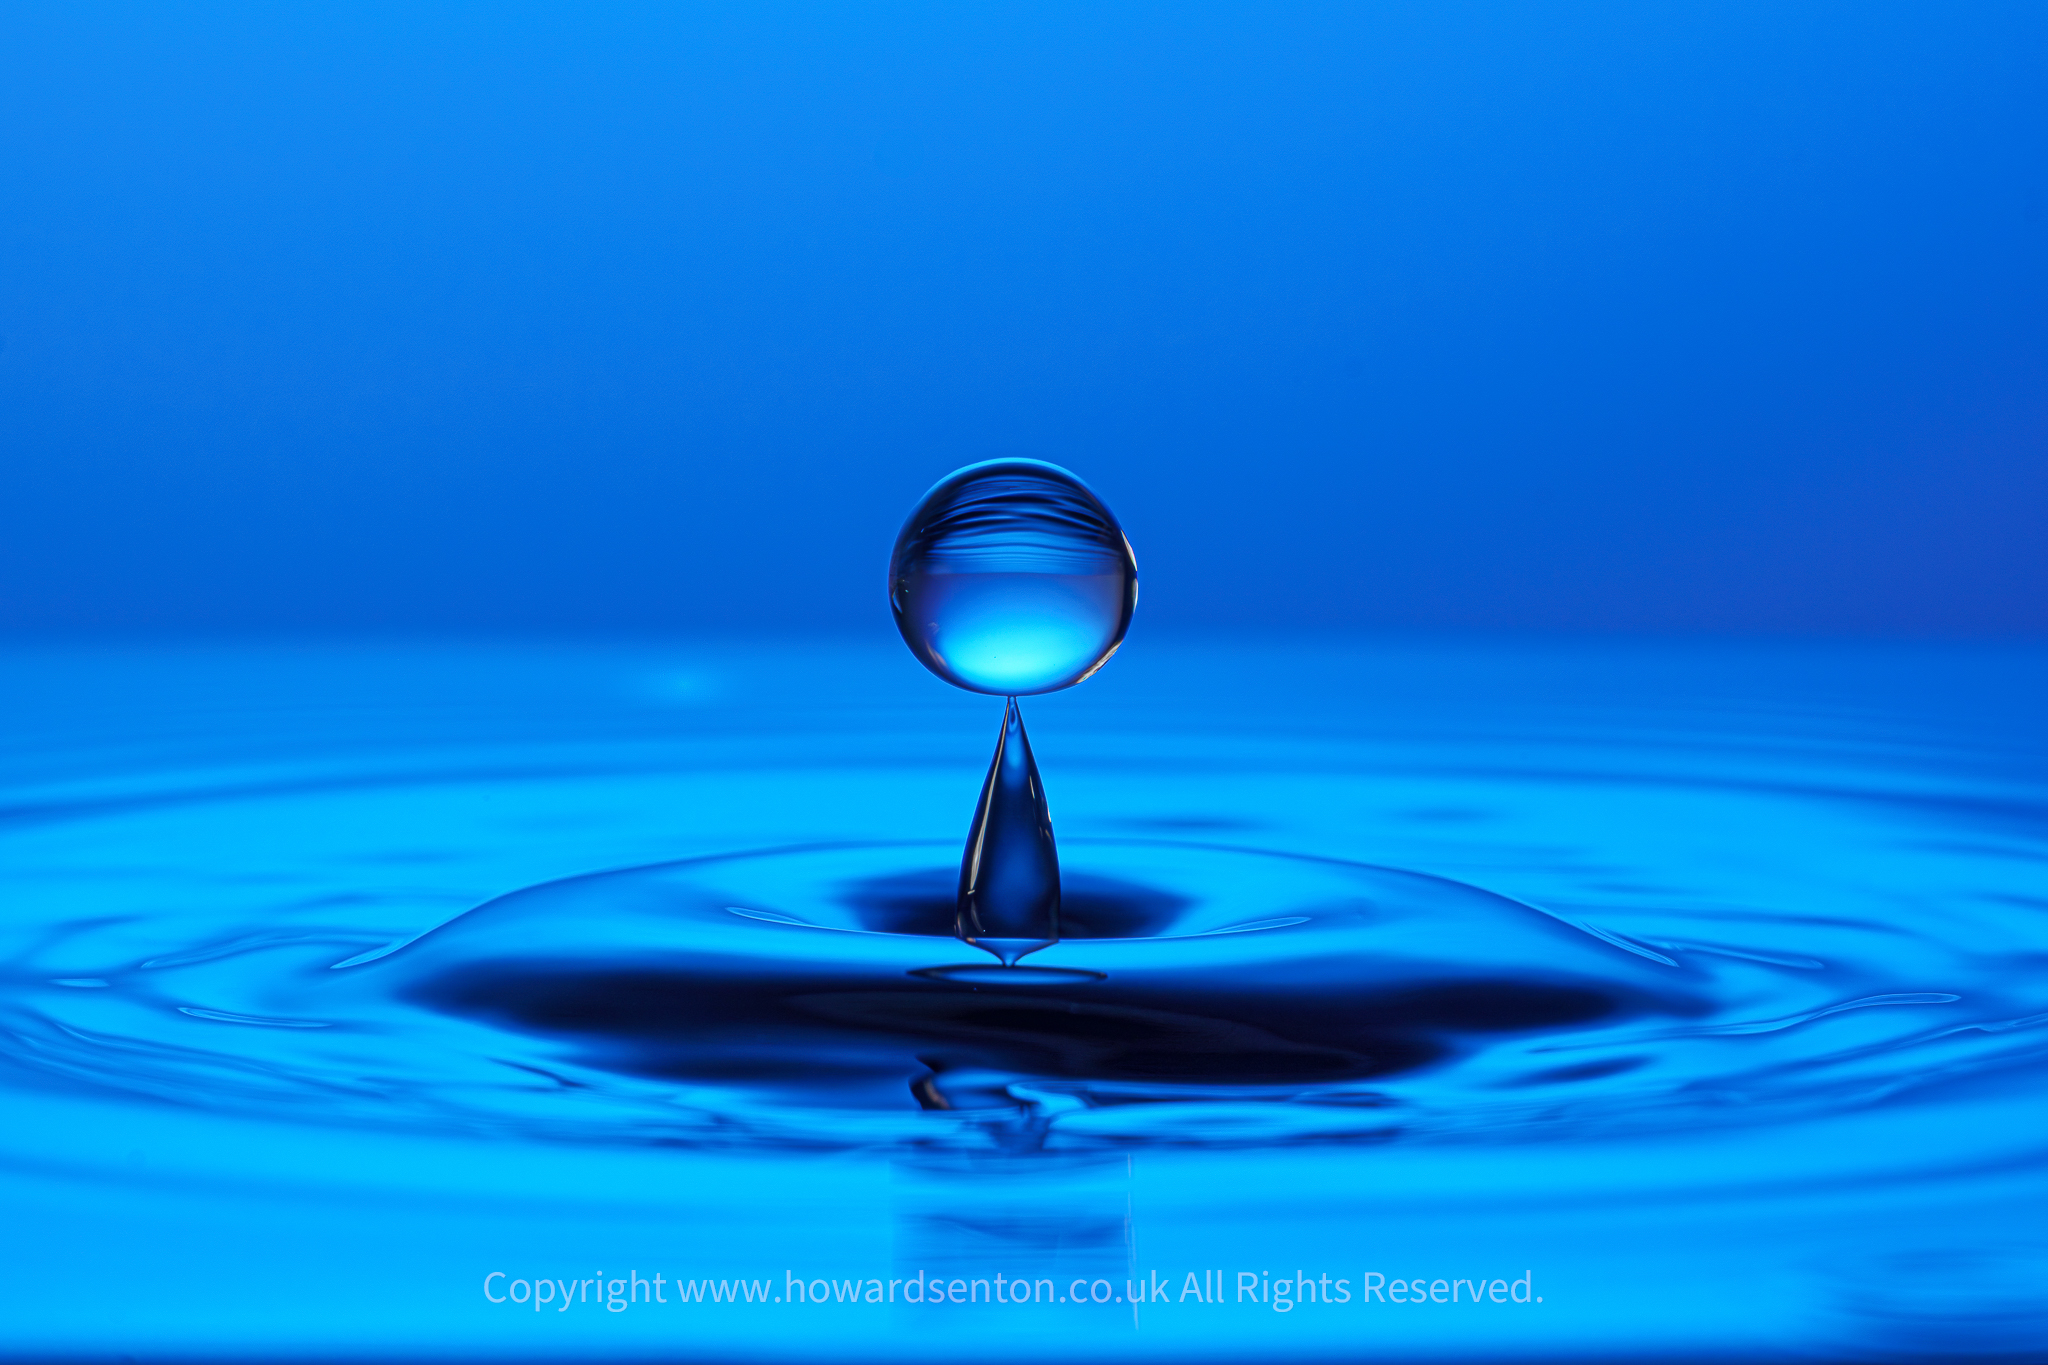
How to Photograph Water Droplets Using a Phone or Camera with Flash
Water droplet photography is one of those photography projects that looks complicated but is surprisingly easy to try at home. With a glass of water, a few simple household items, a phone or camera and a flash, you can create sharp, colourful images of droplets frozen in mid-air.
You don’t need an expensive macro lens or a professional studio. The key ingredients are good lighting, a fast shutter speed, focus, patience and plenty of attempts.
In this guide, I’ll show you how to photograph water droplets using both a smartphone and a camera with flash, along with some ideas for making your images more interesting.
What You Need
You can start with very basic equipment.
For a phone
- Smartphone with a manual or Pro camera mode if available
- Small tripod or something to hold the phone steady
- A glass, bowl or container
- Water
- A tap, pipette, syringe or teaspoon
- A dark or colourful background
- A small LED light or phone light
- Optional external flash or compatible phone lighting
For a camera
- Mirrorless or DSLR camera
- Macro lens or a lens capable of focusing reasonably close
- Flash
- Tripod
- Glass, bowl or container
- Water
- Dropper, pipette or tap
- Background
- Optional coloured lights, gels or household objects
A macro lens can give you more magnification, but you don’t need one to start.
Setting Up Your Water Droplet Experiment
The simplest setup is to photograph droplets falling into a shallow container of water.
Place your container on a stable surface and position your camera or phone so that it is roughly level with the water.
You can use a small glass dish, baking tray or dark-coloured bowl.
A dark background often makes the water stand out, while a bright or colourful background can create reflections and unusual colours inside the droplets.
Creating the Drops
There are several ways to produce consistent drops.
Use a tap
Turn the tap on very slowly until you have a regular drip.
This is one of the easiest methods because the drops can become surprisingly consistent.
Use a pipette
A pipette or dropper gives you much more control over where the drops land.
Use a syringe
A syringe can produce larger drops and allows you to experiment with different drop sizes.
Don’t worry if your first attempts aren’t perfect. Droplet photography involves a lot of trial and error.
Using a Camera and Flash
A camera with flash gives you much more control than a phone.
The most important setting is your shutter speed.
You need to freeze the movement of the water.
A good starting point is:
- Shutter speed: 1/1000 sec or faster
- Aperture: around f/8
- ISO: 400–800 to start
- Focus: Manual
- Flash: External flash if possible
- Lens: Macro or short telephoto
- Drive mode: Continuous shooting
You may need to adjust these settings depending on your camera, flash and surroundings.
Why Flash Helps
Flash is particularly useful because the very short duration of the flash can help freeze movement.
This is especially useful when you’re working in a relatively dark environment.
Instead of relying entirely on the camera’s shutter speed, you can use the brief burst of light from the flash to capture a sharp droplet.
This technique is often called flash duration freezing.
A Simple Camera Setup
Start by positioning your camera on a tripod.
Focus on the point where the droplet will hit the water.
This is important.
Instead of trying to autofocus on a tiny moving water droplet, place an object such as a pencil, screwdriver or drinking straw into the water at the point where the drop will land.
Focus on that object.
Then switch your lens to manual focus.
Remove the object and leave the focus where it is.
Now every drop should pass through the area where your camera is focused.
Don’t Make the Room Too Bright
If you’re using flash to freeze the action, try working in a darker room.
You don’t necessarily want complete darkness, but reducing the ambient light gives you more control.
Your flash then becomes the main source of light.
Try something like:
ISO 100–400
f/8
1/200 sec
External flash at a low power setting
You can then experiment with the flash power.
If your camera allows high-speed sync, you can also experiment with faster shutter speeds.
Flash Positioning
Don’t simply point the flash directly at the water.
Try placing it to the side.
A flash positioned approximately 45 degrees from the subject can create much more interesting highlights.
You can also place the flash behind the water.
This can produce glowing edges and translucent droplets.
Another interesting setup is to place a colourful background behind the water and illuminate the background rather than the droplets themselves.
The water then picks up the colours.
Add Colour
This is where water droplet photography can become really creative.
Try placing colourful objects behind the water.
You could use:
- Fruit
- Coloured paper
- Flowers
- LED lights
- Christmas lights
- A colourful screen
- Coloured glass
- Fabric
- Leaves
The water acts almost like a tiny lens, reflecting and refracting the colours behind it.
You can also experiment with coloured gels over your flash.
A red flash from one side and a blue light from another can produce completely different results from ordinary white light.
Photographing the Splash
Don’t just photograph the drop before it hits the water.
Some of the best photographs happen immediately after impact.
You can capture:
- Crowns
- Columns of water
- Mushroom shapes
- Bouncing droplets
- Collisions
- Water sculptures
- Droplets flying upwards
The exact moment of impact is extremely short, so you’ll probably need lots of photographs.
This is where continuous shooting can help.
Timing the Shot
Timing is one of the hardest parts of droplet photography.
If you’re using a simple dripping tap, watch the rhythm of the drops.
You may start to recognise the approximate time between each drop.
Press the shutter just before the drop reaches the water.
With a camera capable of continuous shooting, hold the shutter down and capture a sequence.
You can then select the best frame afterwards.
Don’t be disappointed if you take 100 photographs and only get five good ones.
That’s completely normal.
Photographing Droplets Without a Water Surface
You don’t have to photograph drops hitting water.
You can also photograph individual drops falling through the air.
For this technique, use a dark background and place your flash behind or to the side of the drop.
A macro lens can produce fantastic results.
Try photographing the drop against:
- Black card
- Coloured card
- A window
- A bright LED light
- A colourful background
The background can completely change the appearance of the photograph.
Using a Phone
You can also create excellent water droplet photographs using a modern smartphone.
The biggest limitation is usually focusing and controlling exposure.
If your phone has a Pro, Manual or Expert mode, use it.
Try:
- Fast shutter speed
- Low or moderate ISO
- Manual focus if available
- Exposure compensation
- Burst mode
Some phones allow shutter speeds of 1/1000 sec or faster, which can be very useful.
Use Slow Motion to Help
If your phone has a slow-motion video mode, you can use it to study the movement of the droplets.
Record the drops hitting the water in slow motion and watch the footage afterwards.
You can use this to work out exactly when the splash occurs.
You can then use that information to improve your still photographs.
Using a Phone With Flash
The built-in phone flash isn’t always ideal because it is close to the lens and can produce flat-looking light.
If possible, try using an external LED light or another light source from the side.
However, you can still experiment with the phone’s flash.
Try photographing in a darker room and position the water against a dark background.
The flash can help freeze the movement, although a dedicated camera flash generally gives you more control.
If your phone has a dedicated camera accessory or compatible external lighting system, experiment with positioning the light away from the phone.
Try Backlighting the Droplets
One of my favourite techniques is backlighting.
Place the light behind the water and point it towards the camera.
You need to be careful not to photograph directly into an extremely bright light source, but with the correct positioning you can create beautifully illuminated droplets.
The edges of the water can glow while the centre remains darker.
This works particularly well with coloured lights.
Use a Tripod
A tripod isn’t essential, but it makes the process much easier.
Once your camera is positioned, you don’t want to keep moving it.
Set everything up first:
- Position the container.
- Position the camera.
- Compose the photograph.
- Focus on the drop location.
- Switch to manual focus.
- Set the exposure.
- Position the flash.
- Start dropping the water.
- Take lots of photographs.
This turns the experiment into a repeatable setup rather than constantly changing everything.
Experiment With Different Drop Sizes
Small drops and large drops behave very differently.
Try changing the height of the drop.
A drop falling from a greater height will have more energy when it hits the water.
You may see larger splashes and taller water columns.
A drop falling from a lower height can produce much smaller and more delicate shapes.
Try several different heights and see what happens.
Photograph Two Drops Colliding
Once you’ve mastered single drops, try photographing two drops.
This is much harder but can produce incredible shapes.
You can create two separate dripping points and adjust their timing so that the drops collide.
Alternatively, use a controlled dropper system.
When two droplets collide, you may capture a completely unexpected water sculpture.
This is a great project if you’re looking for something more challenging.
Camera Settings to Try
Here’s a useful starting point for a dedicated camera:
| Setting | Starting Point |
|---|---|
| Shutter speed | 1/1000 sec |
| Aperture | f/8 |
| ISO | 400 |
| Focus | Manual |
| Flash | External |
| Flash power | Low |
| White balance | Flash |
| Drive mode | Continuous |
| Tripod | Recommended |
These are starting points rather than fixed settings.
If your photographs are too dark, increase the ISO, open the aperture or increase the flash power.
If the background is too bright, reduce the ambient light or change your exposure.
Don’t Forget About Depth of Field
Macro photography has very little depth of field.
At close distances, even f/8 may not give you everything you want in focus.
This is another reason to carefully position the camera and focus point.
If you want a larger part of the splash sharp, try stopping down to:
f/11 or f/16
You’ll probably need more light to compensate.
Shoot in RAW
If you’re using a dedicated camera, photograph in RAW if possible.
RAW files give you much more flexibility when editing.
You can adjust:
- Exposure
- White balance
- Highlights
- Shadows
- Contrast
- Colour
- Sharpness
- Cropping
Water droplets can also benefit from a little extra contrast and sharpening.
Don’t overdo it, though. Natural-looking water usually looks better than an aggressively processed photograph.
Editing Your Water Droplet Photographs
After the shoot, look through the photographs and pick the frames with the best shapes.
You don’t necessarily want the biggest splash.
Sometimes the smallest, most unusual shape makes the strongest photograph.
In Lightroom, Photoshop or your preferred editing software, you can try:
- Increasing contrast
- Lowering highlights
- Increasing clarity or texture slightly
- Adjusting colour
- Cropping tightly
- Increasing sharpening
- Removing distracting background elements
You can also convert the image to black and white for a completely different look.
Safety and Keeping Your Equipment Dry
Water and camera equipment don’t mix.
Keep the camera, flash and electrical equipment away from the container.
Use towels around the setup and make sure water cannot splash onto your equipment.
If you’re using a phone, consider a waterproof case or keep the phone well away from the splash zone.
A small amount of water can quickly become a very expensive accident.
My Favourite Water Droplet Challenge
Once you’ve got the basic technique working, try this:
Create a photograph of a water droplet just as it hits the surface and produces a perfect crown.
Start with a single drop.
Then try to capture:
- The drop falling.
- The first contact with the water.
- The splash crown.
- The upward column.
- The secondary droplets.
You may end up with completely different photographs from the same setup.
That’s part of the fun.
Final Tips
Water droplet photography is a great example of how you don’t need an expensive location or complicated subject to create interesting photographs.
Start simple.
Use a bowl, some water, a dropper and your phone or camera.
If you’re using a dedicated camera, add a flash and experiment with fast shutter speeds, manual focus and different lighting positions.
The biggest secret is take lots of photographs.
The difference between an ordinary splash and an amazing water sculpture can be just a fraction of a second.
And remember: don’t concentrate only on getting a sharp photograph. Look for interesting shapes, reflections, colours and moments that you can’t normally see with the naked eye.
Once you start experimenting, water droplets can become a surprisingly addictive photography project.
Quick Setup
Phone:
Fast shutter speed + burst mode + good light + stable camera.
Camera:
Manual focus + around f/8 + fast shutter speed + external flash + tripod.
Most important:
Control the light, focus on the drop zone and take plenty of photographs.
The more you experiment, the more unusual water sculptures you’ll discover.
No responses yet